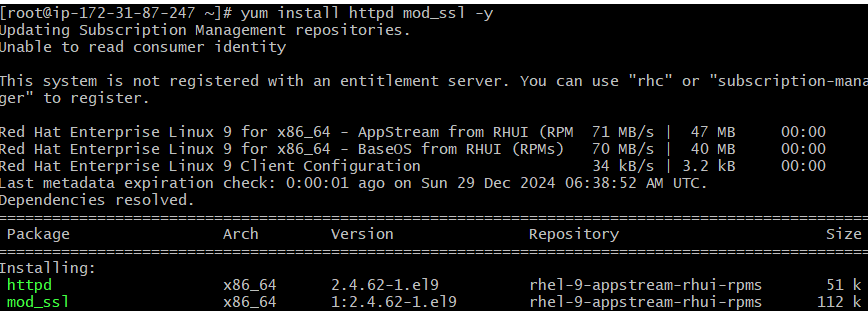
Launch an EC2 instance and install the required packages: httpd & mod_ssl
yum install httpd mod_ssl -y
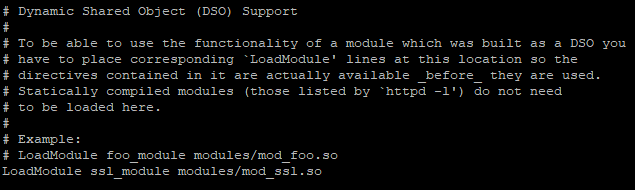
-> Add the following line in httpd configuration file if it is not listed.
LoadModule ssl_module modules/mod_ssl.so
vi /etc/httpd/conf/httpd.conf
-> Start and enable httpd service.
sudo systemctl start httpd
sudo systemctl enable httpd
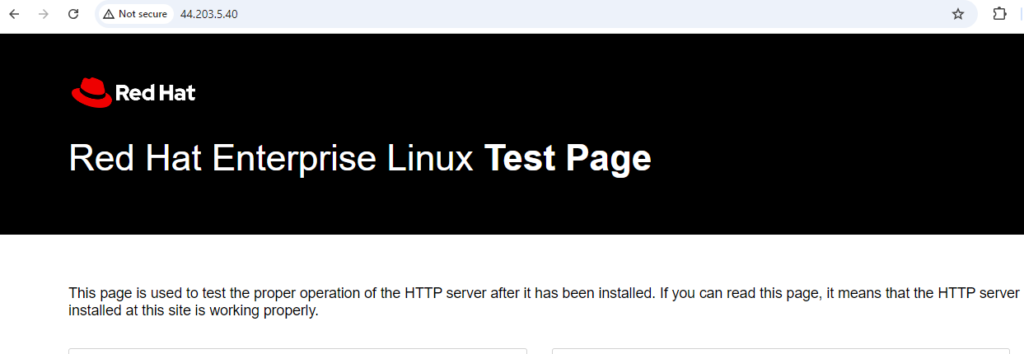
-> To confirm the Apache installation, open your web browser and type in the server’s public IP address. A test page should appear.
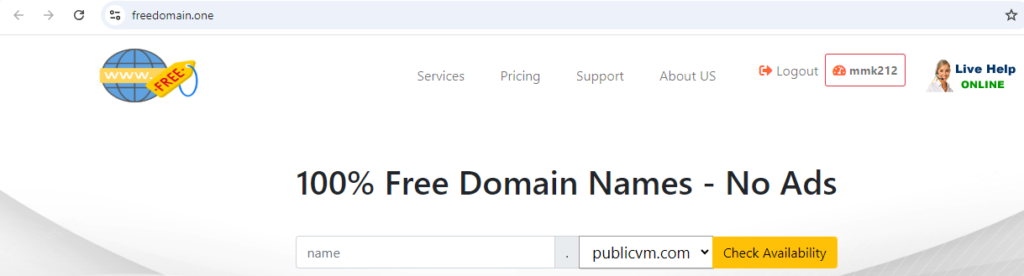
-> Buy a domain name from providers like GoDaddy, Namecheap, or others.
-> For this tutorial, I used a free domain provided by freedomain.one

Point your domain to the server where Apache is installed.
-> Navigate to the domain list and select your domain.
-> Add A record pointing your domain to the server’s public IP address.

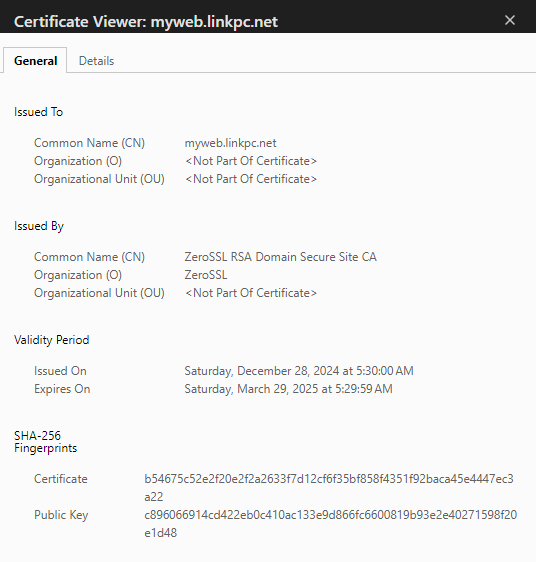
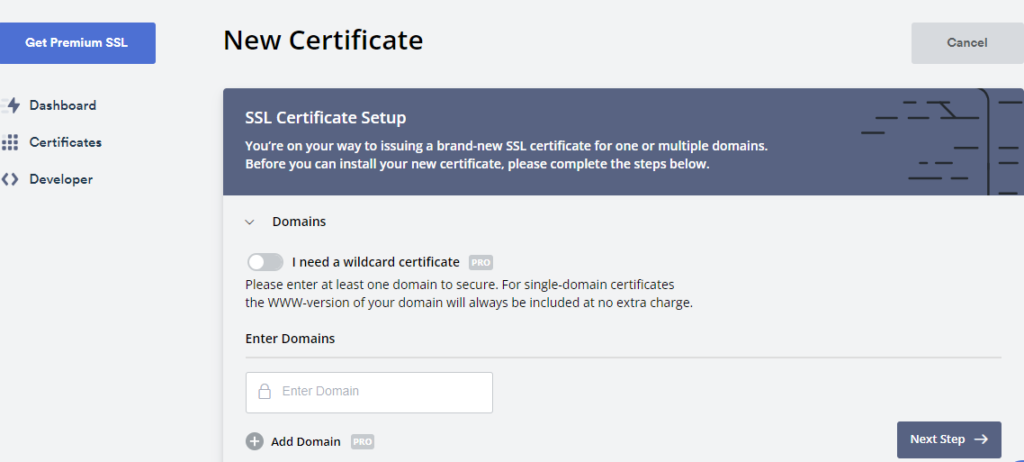
-> Obtain an SSL certificate from Godaddy or use a free SSL certificate provided by zerossl.com
-> Create an account and log in to the ZeroSSL website.
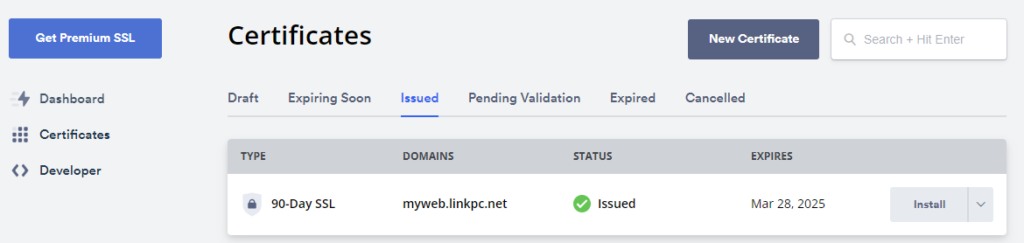
Go to Dashboard -> Click on Certificates -> Create a new certificate and download the certificate files.
-> Copy the certificate files to the below directory on the Apache web server.
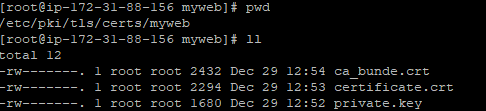
-> Make sure the certificate files have appropriate permissions.
chmod -R 600 /etc/pki/tls/certs/myweb
-> Add/update the following lines in /etc/httpd/conf.d/ssl.conf file.
ServerName myweb.linkpc.net
DocumentRoot /var/www/html
SSLCertificateFile /etc/pki/tls/certs/myweb/certificate.crt
SSLCertificateKeyFile /etc/pki/tls/certs/myweb/private.key
SSLCACertificateFile /etc/pki/tls/certs/myweb/ca_bundle.crt
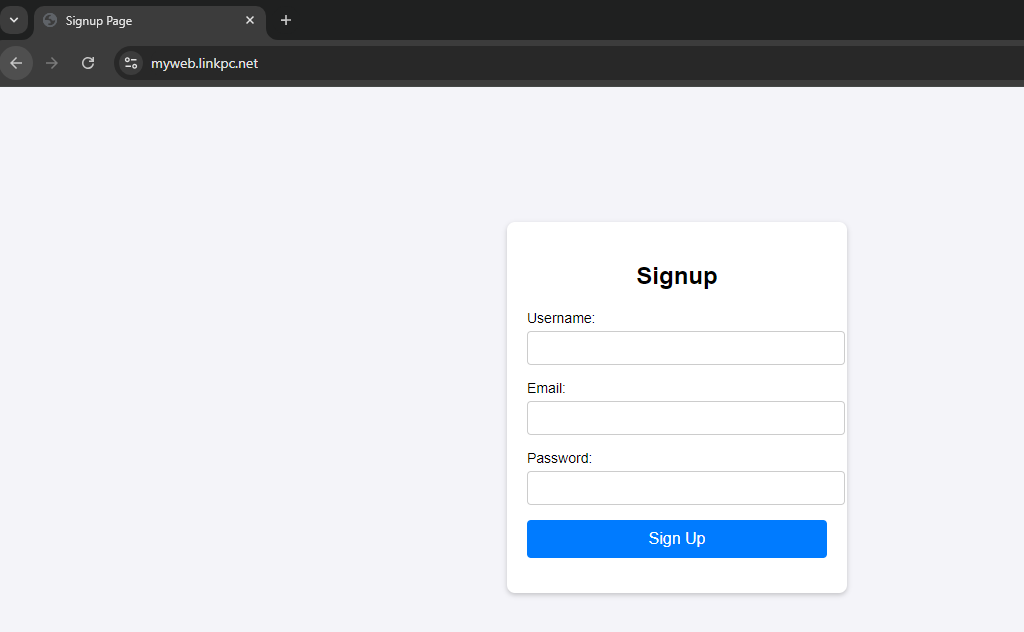
-> Copy your website code to the directory /var/www/html. I used ChatGPT to help create a sample signup page.

-> Restart the apache service
systemctl restart httpd
-> Access your website from the browser and verify.